Design Process with Vintage View
To see my entire wine cellar build with before and after pictures, go HERE.
When I was designing the wine cellar, I knew we could not fit traditional wooden racks under the stairs. I looked for wall mounted racks and came across several sites, including Vintage View. I sketched out many ideas, including a suspended system, and finally decided to go with Vintage View.
I was browsing around Vintage View’s website trying to figure out how many racks I’ll need, comparing costs, colors, etc. I had no idea Vintage View offered free design services until I stumbled upon it while mindlessly scrolling their website. Up until then, I was wondering how I was going to accurately calculate how many racks, what sizes, and etc I needed. I absolutely utilized this service. The first 3 designs are at no cost. I sent the design request submission and waited.
Natalie reached out soon after my design request. Luckily, we already had an idea in mind and was looking forward to seeing them bring life to this project with the accuracy I was struggling with.
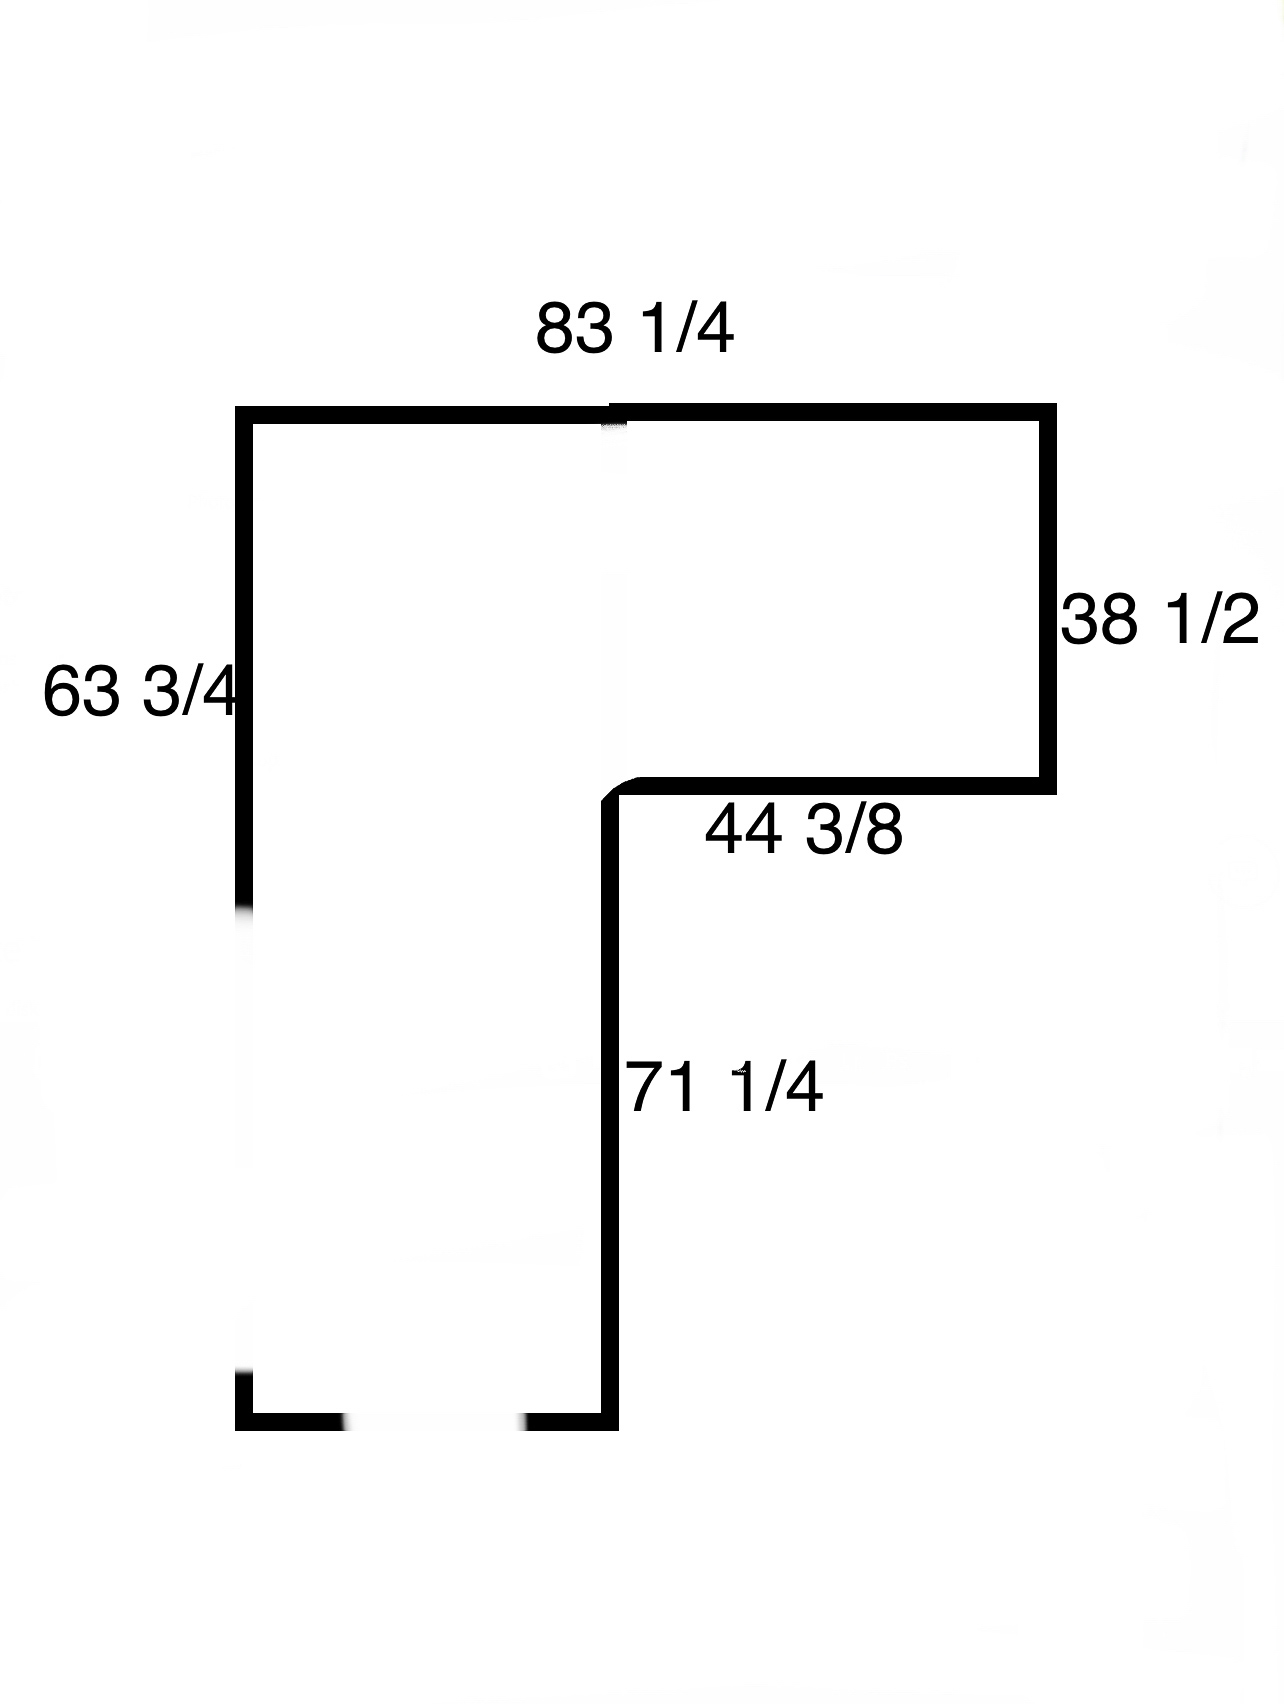
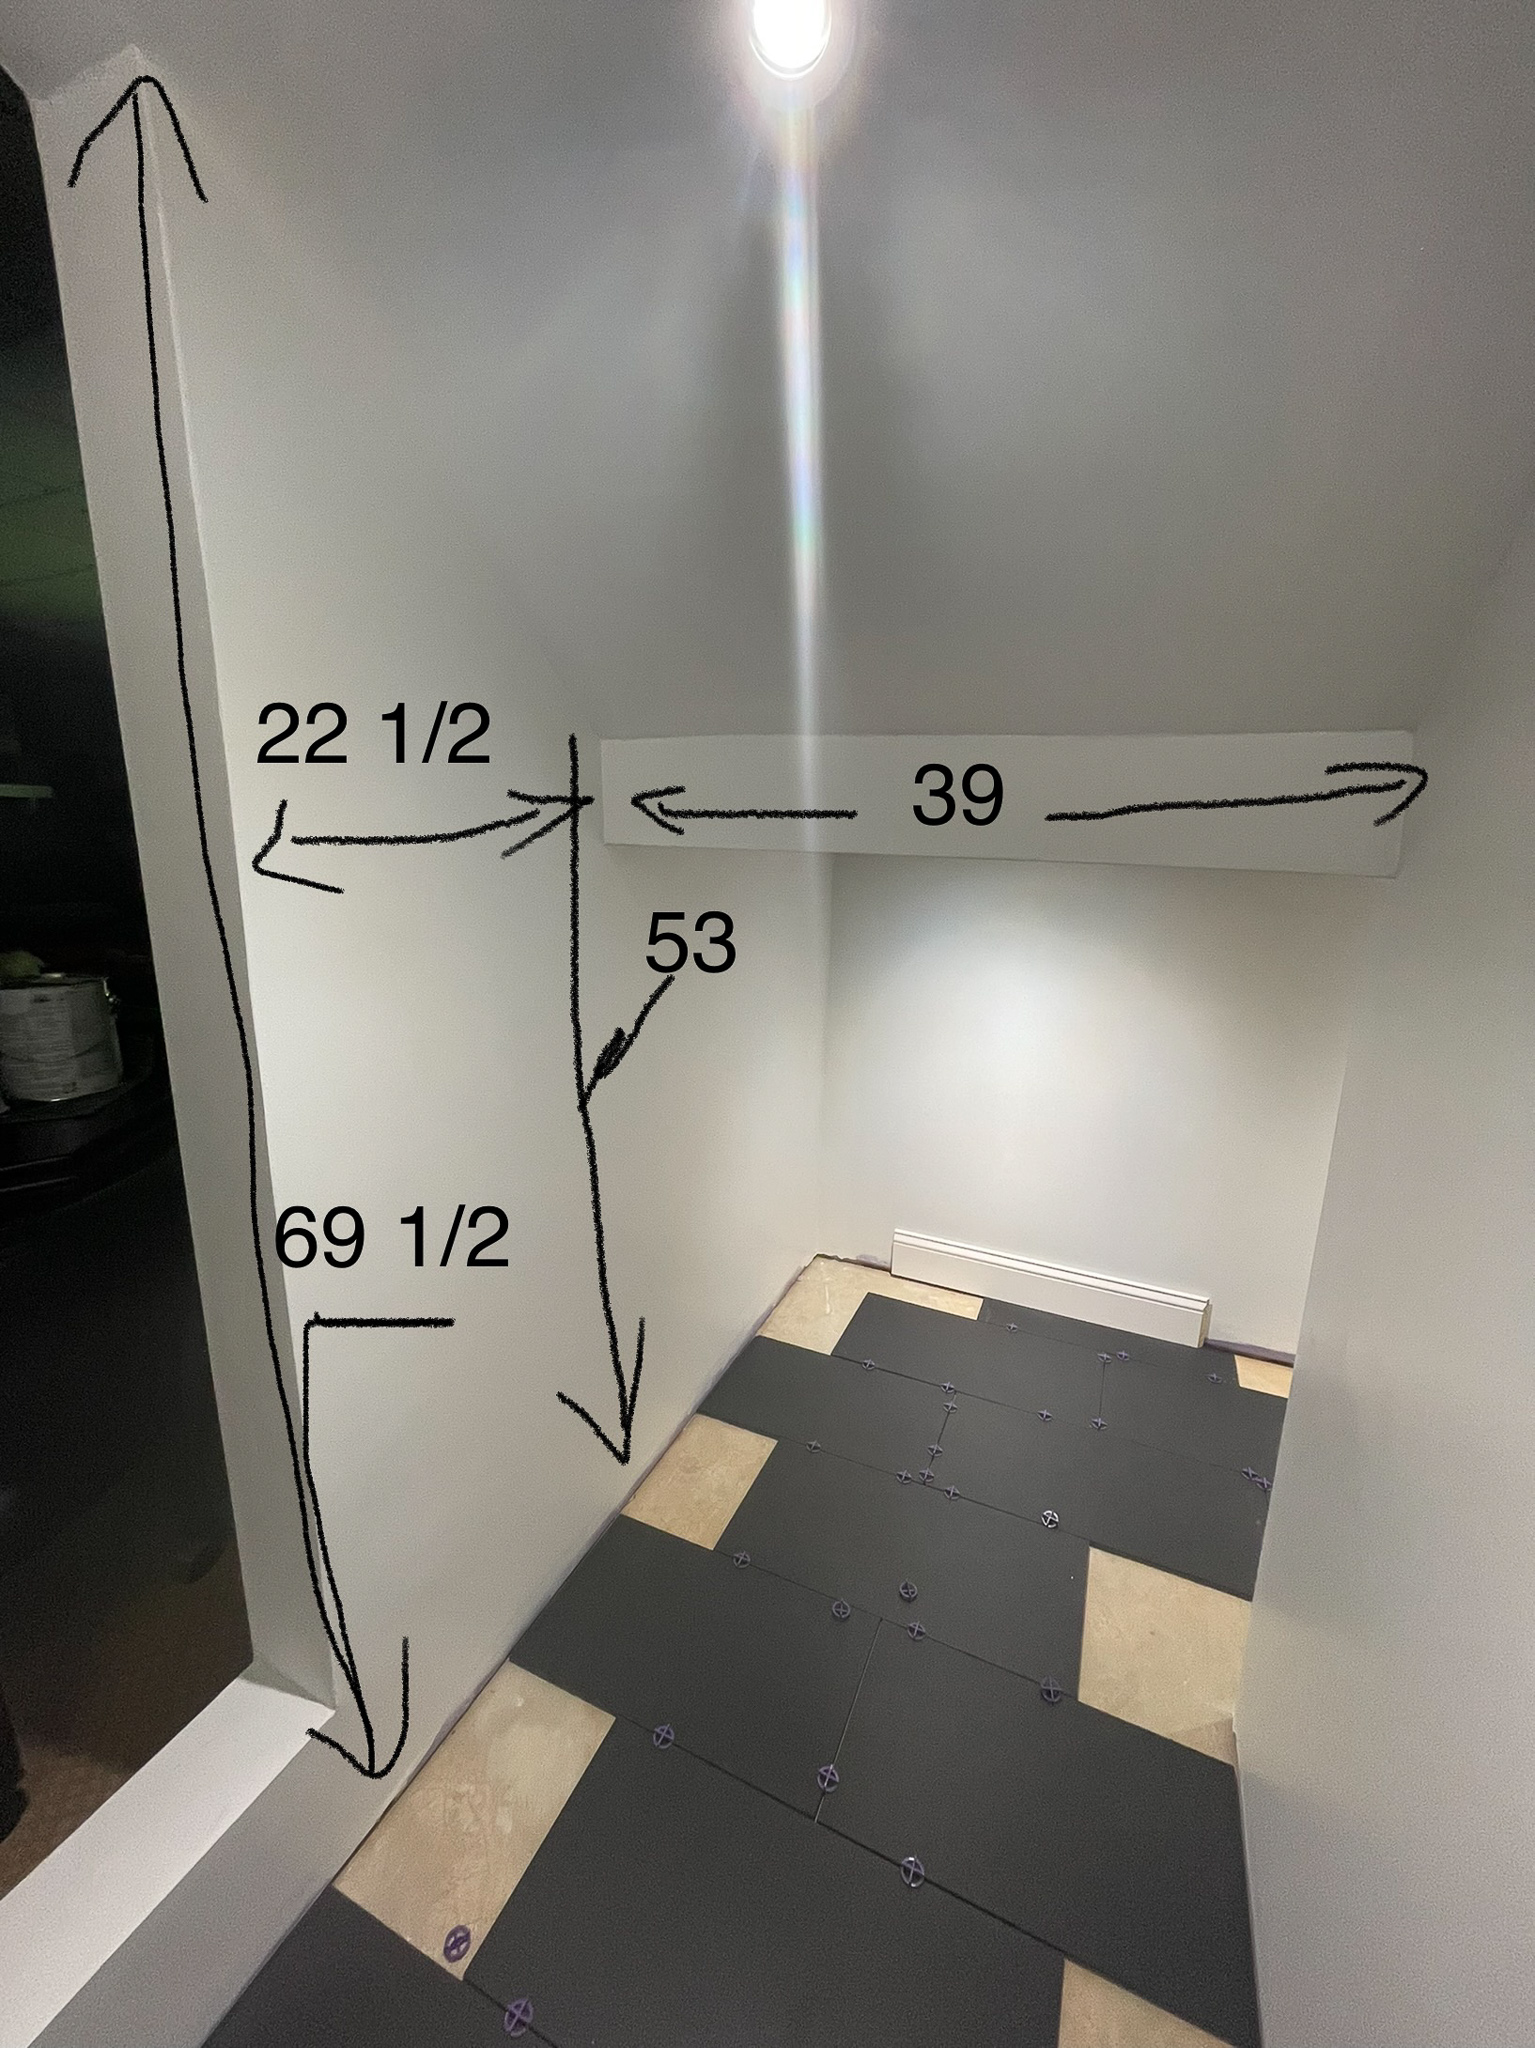
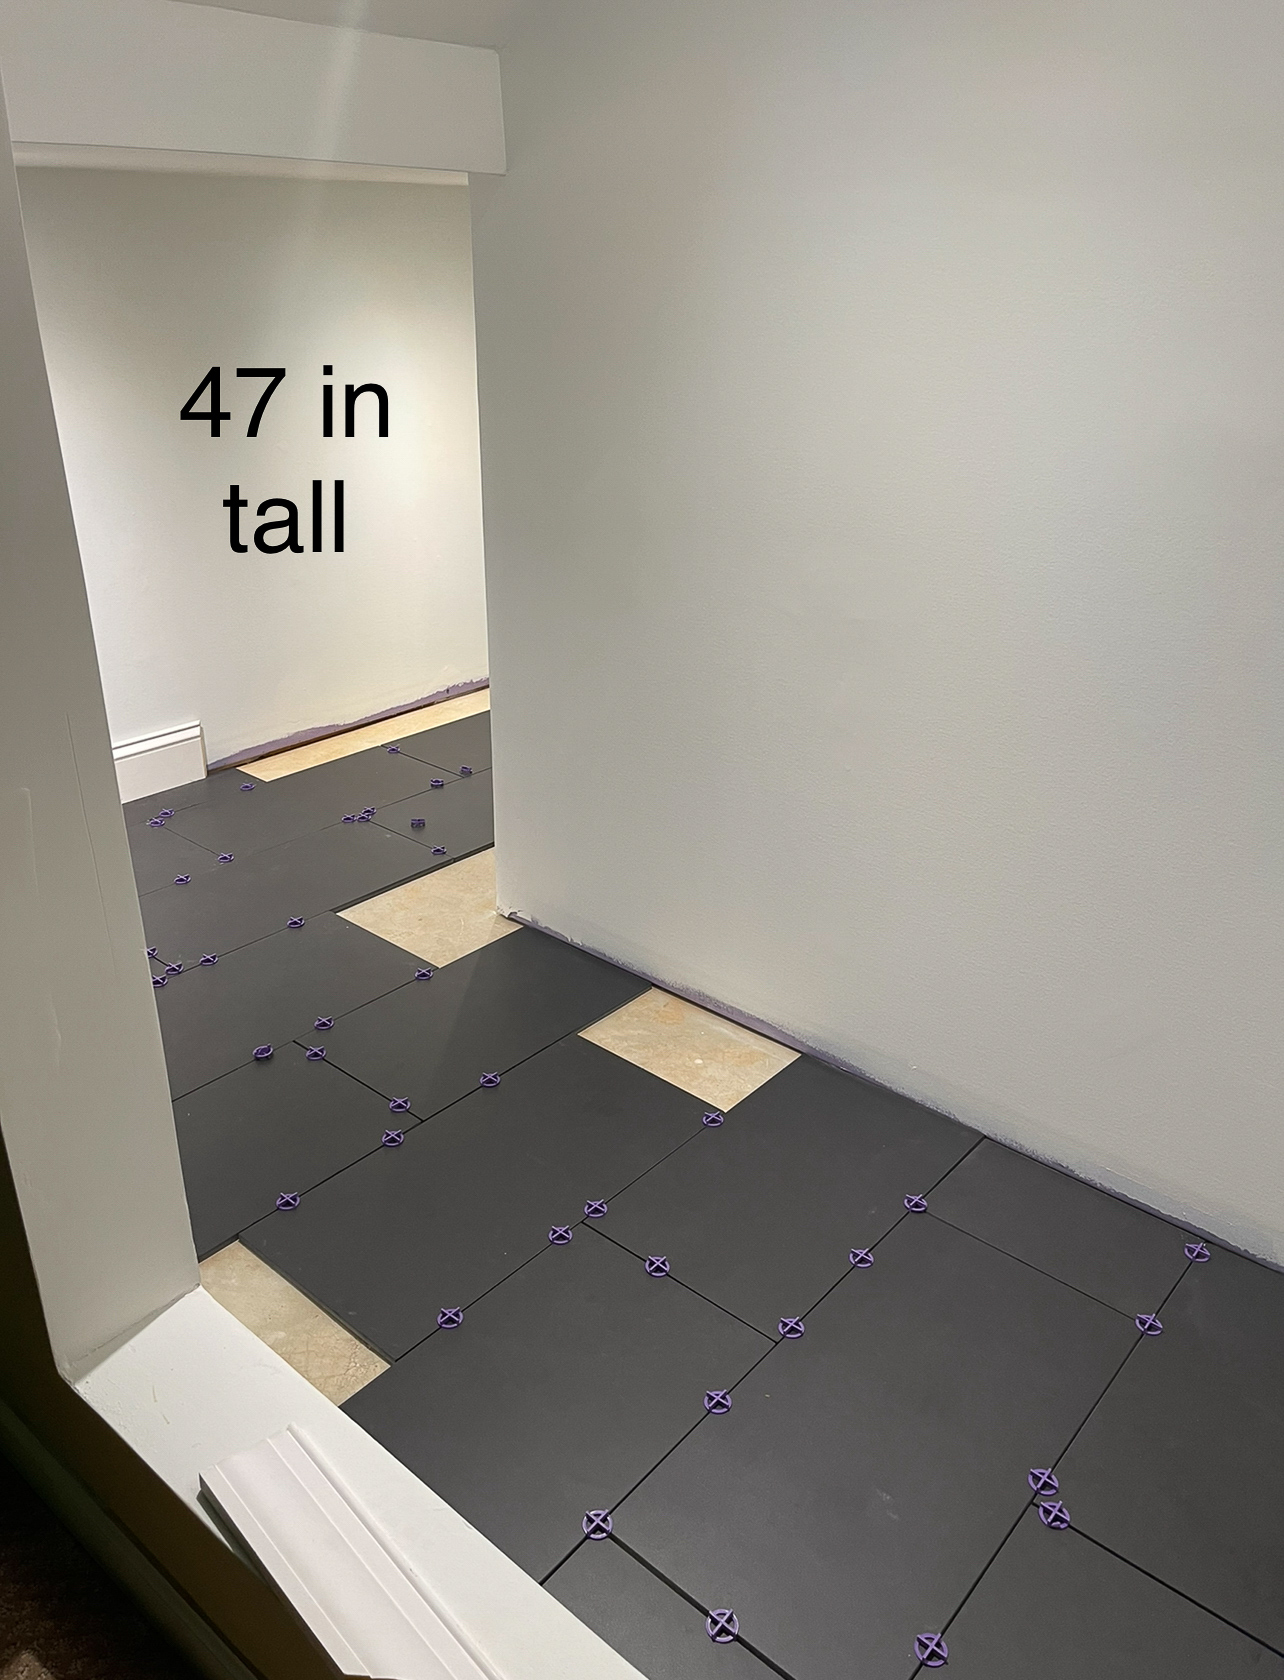
I was not fully prepared to provide measurements and photoshop went down at the last minute (my fault, I need a new computer). So I gave some very amateur pictures/drawings to get this process started. Haha! Enjoy:)
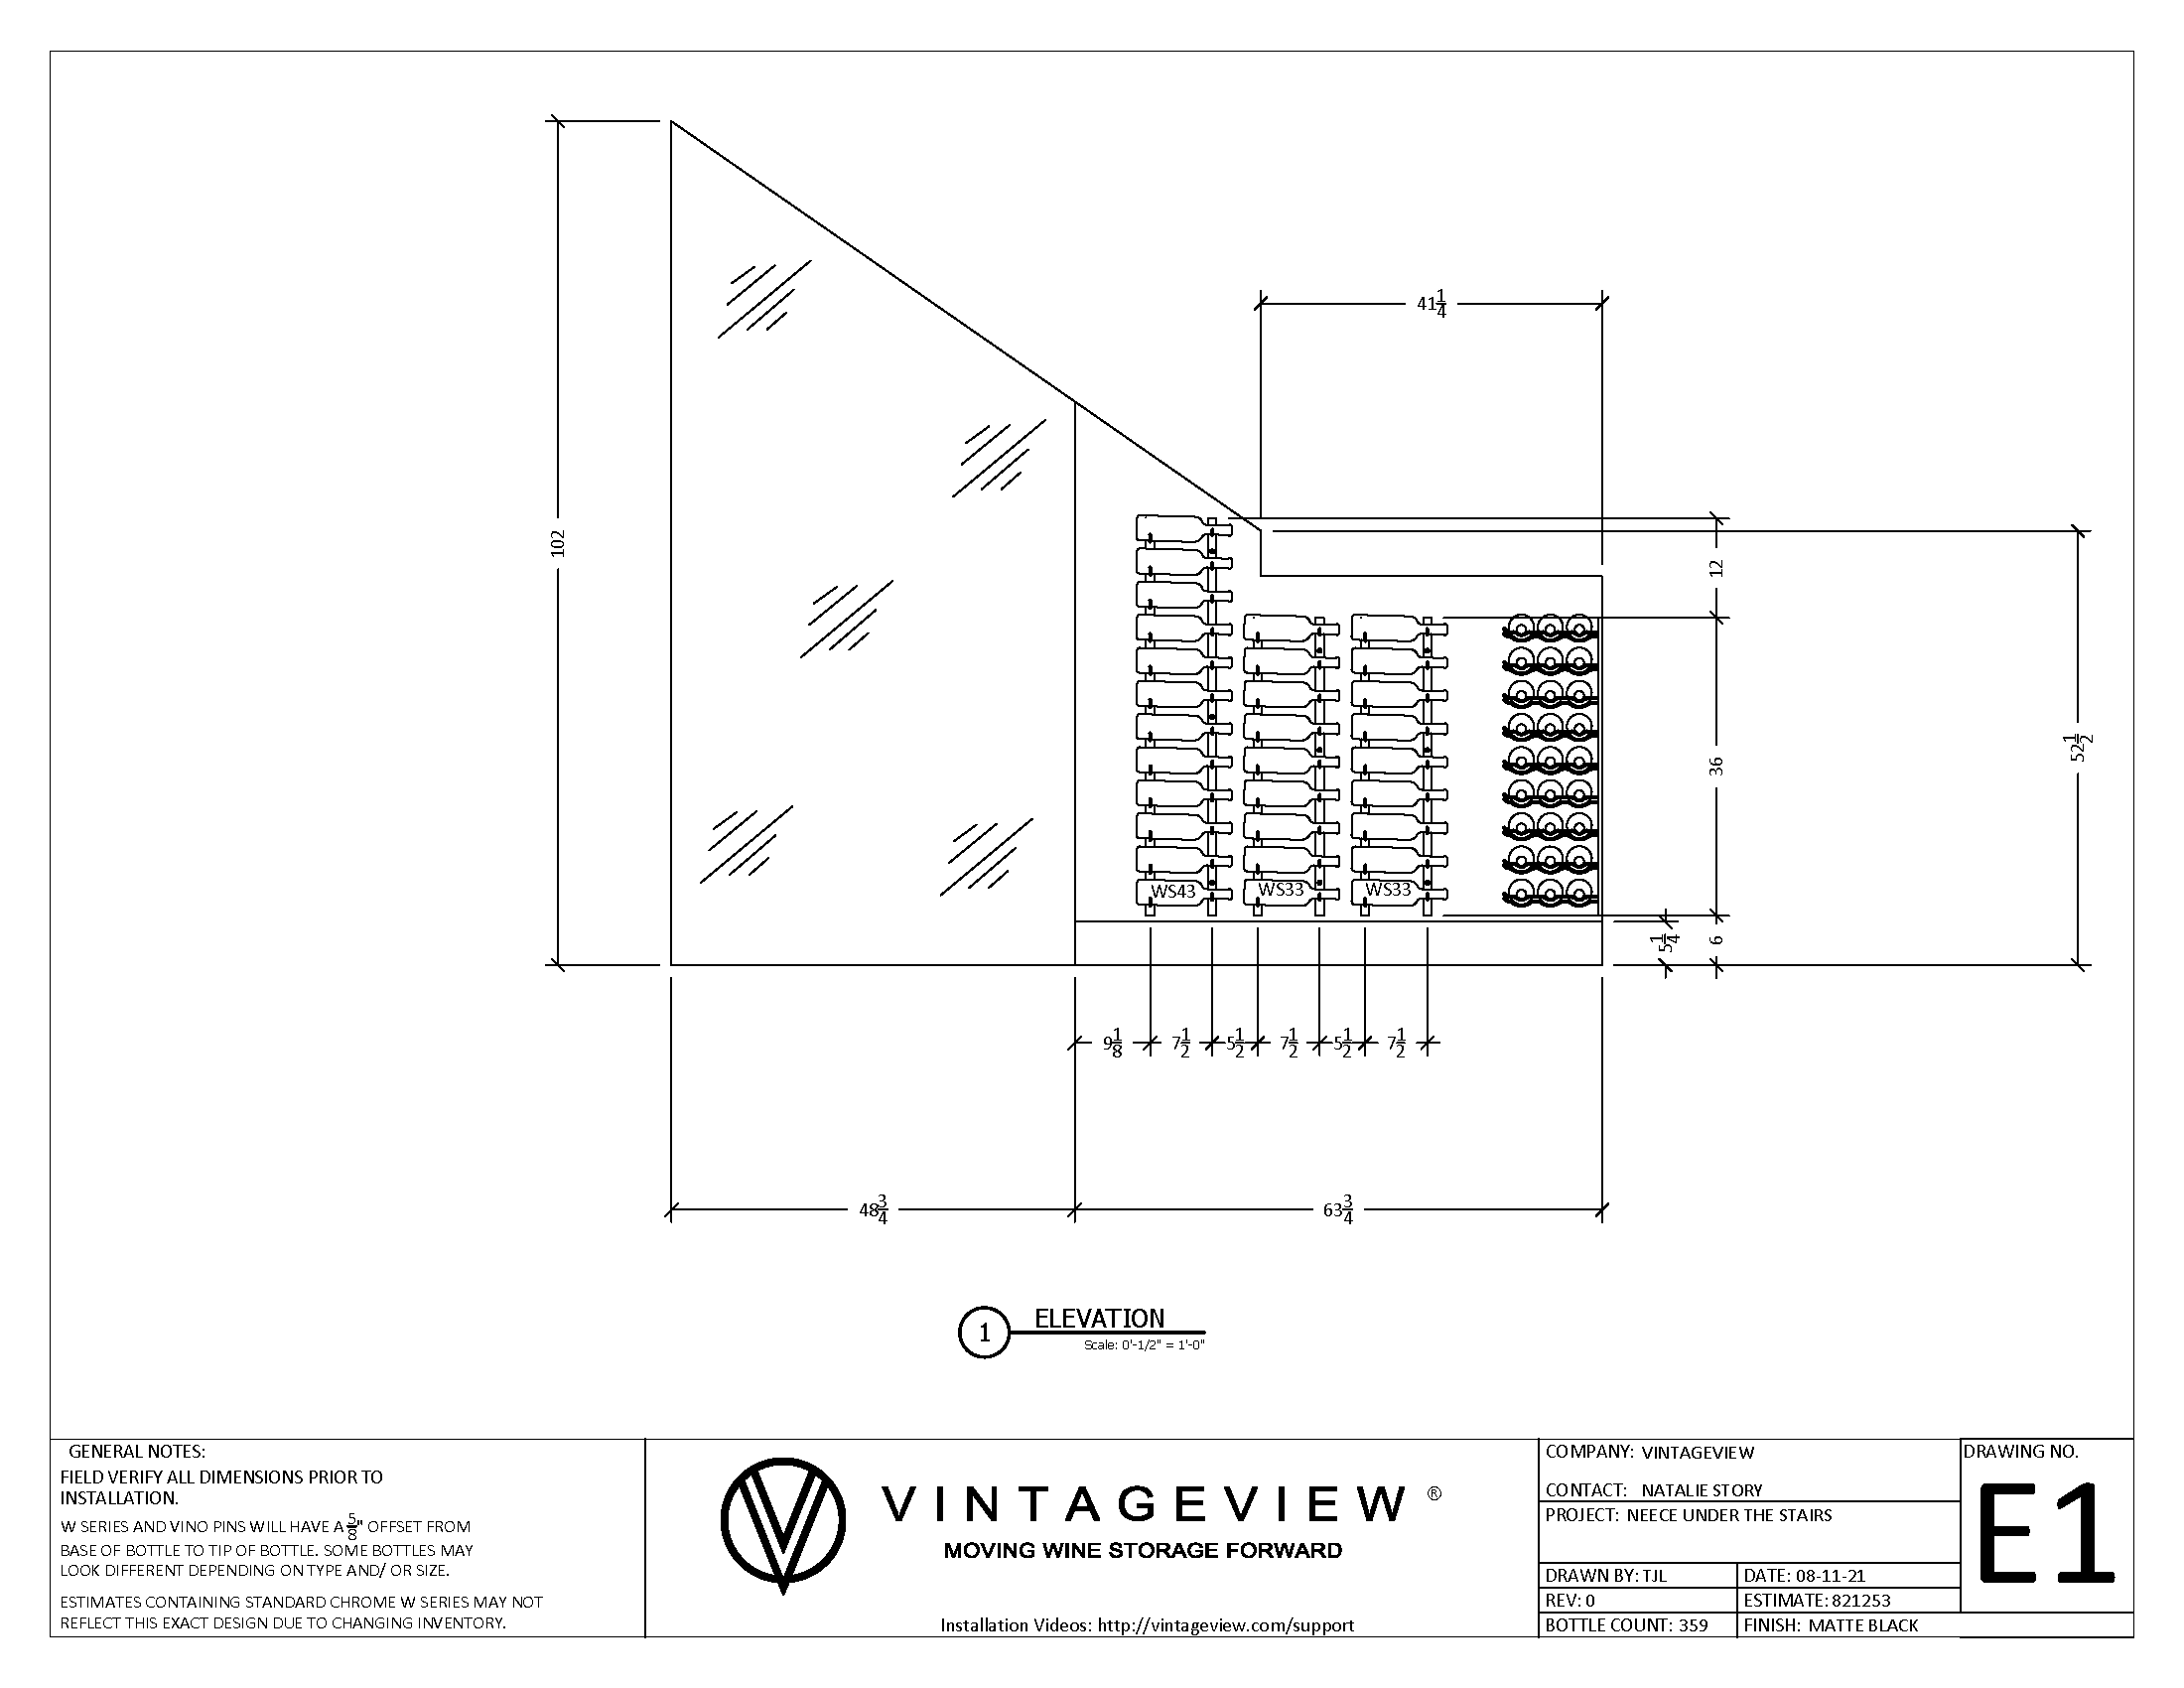
First Design
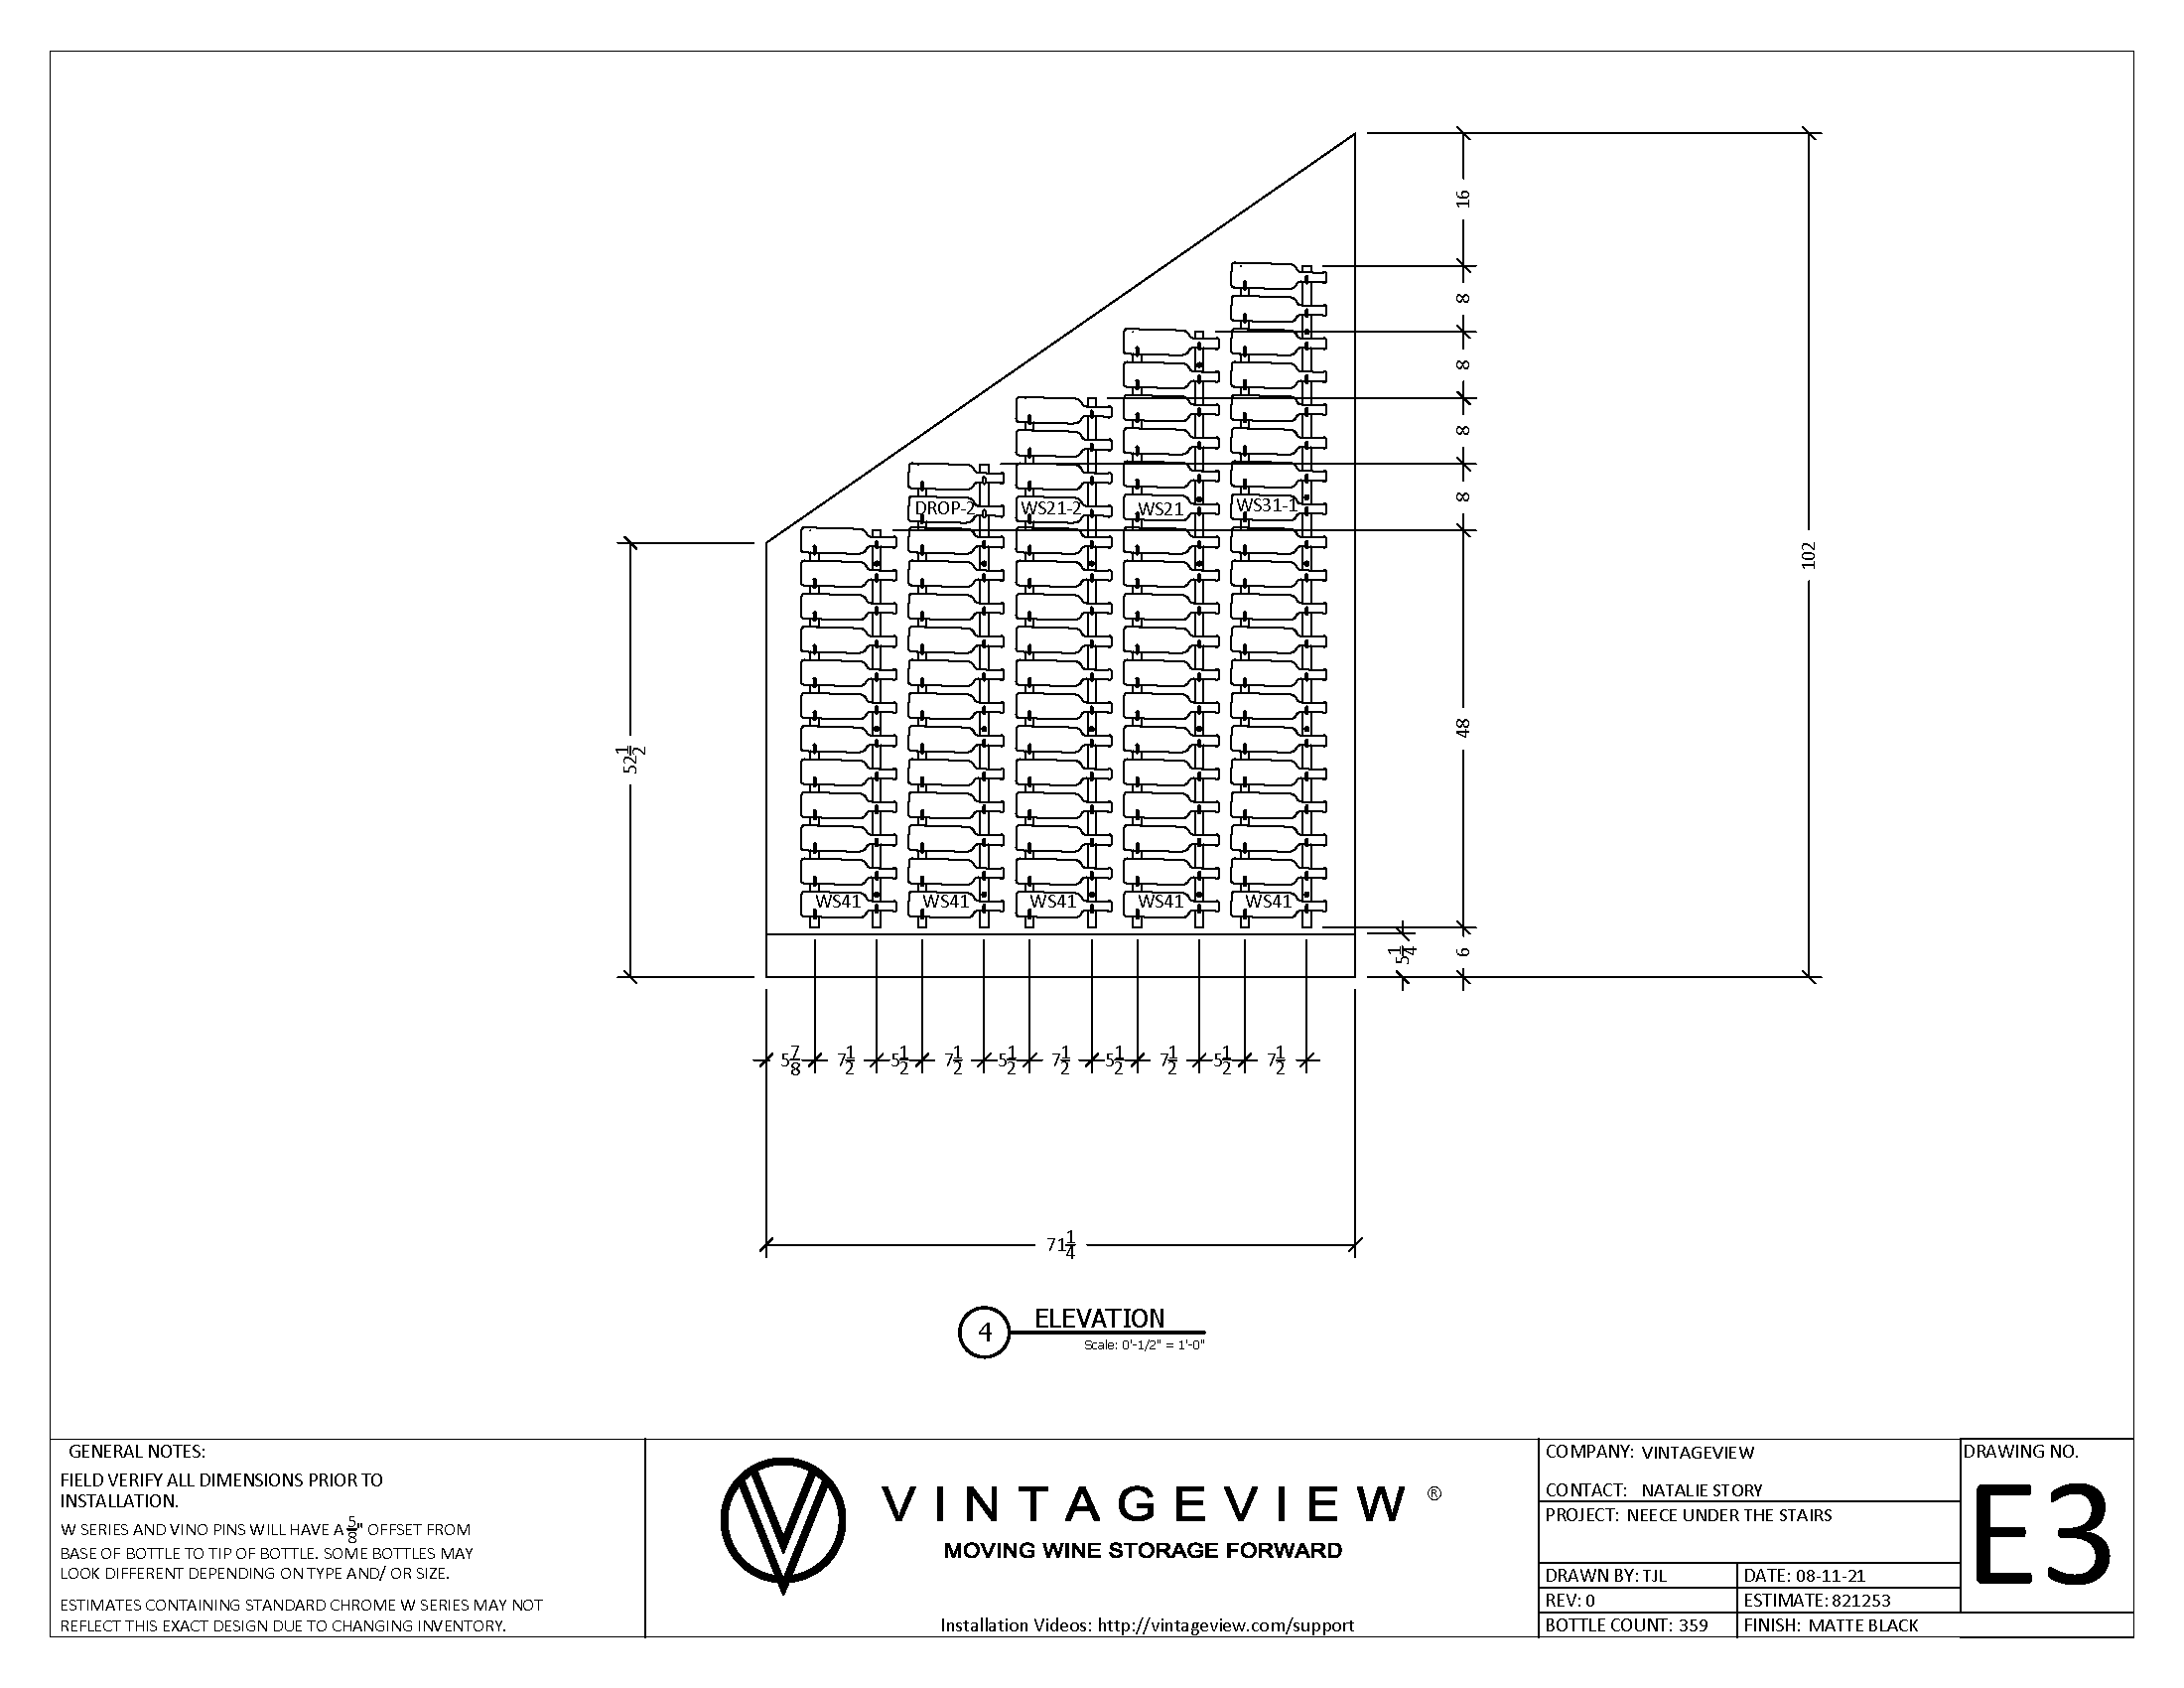
We received the initial design back from Natalie. this design will hold 359 bottles. We were excited. I don’t want to change much. I would like to see 2 rows of bottles instead of 3 as well as the addition of a magnum bottle rack.
I messaged Natalie back with my changes and asked her thoughts on it and asked if they offered 3D renderings to be able to see everything before the install. She informed me they offered 3D renderings, at the time of this post, the cost of that $175 for the first angle and $150 for additional angles or revisions. She agreed our proposed changes was a great idea and sent the design back for changes, stating the changes will take 2-3 business days. We decided against the 3D renderings.
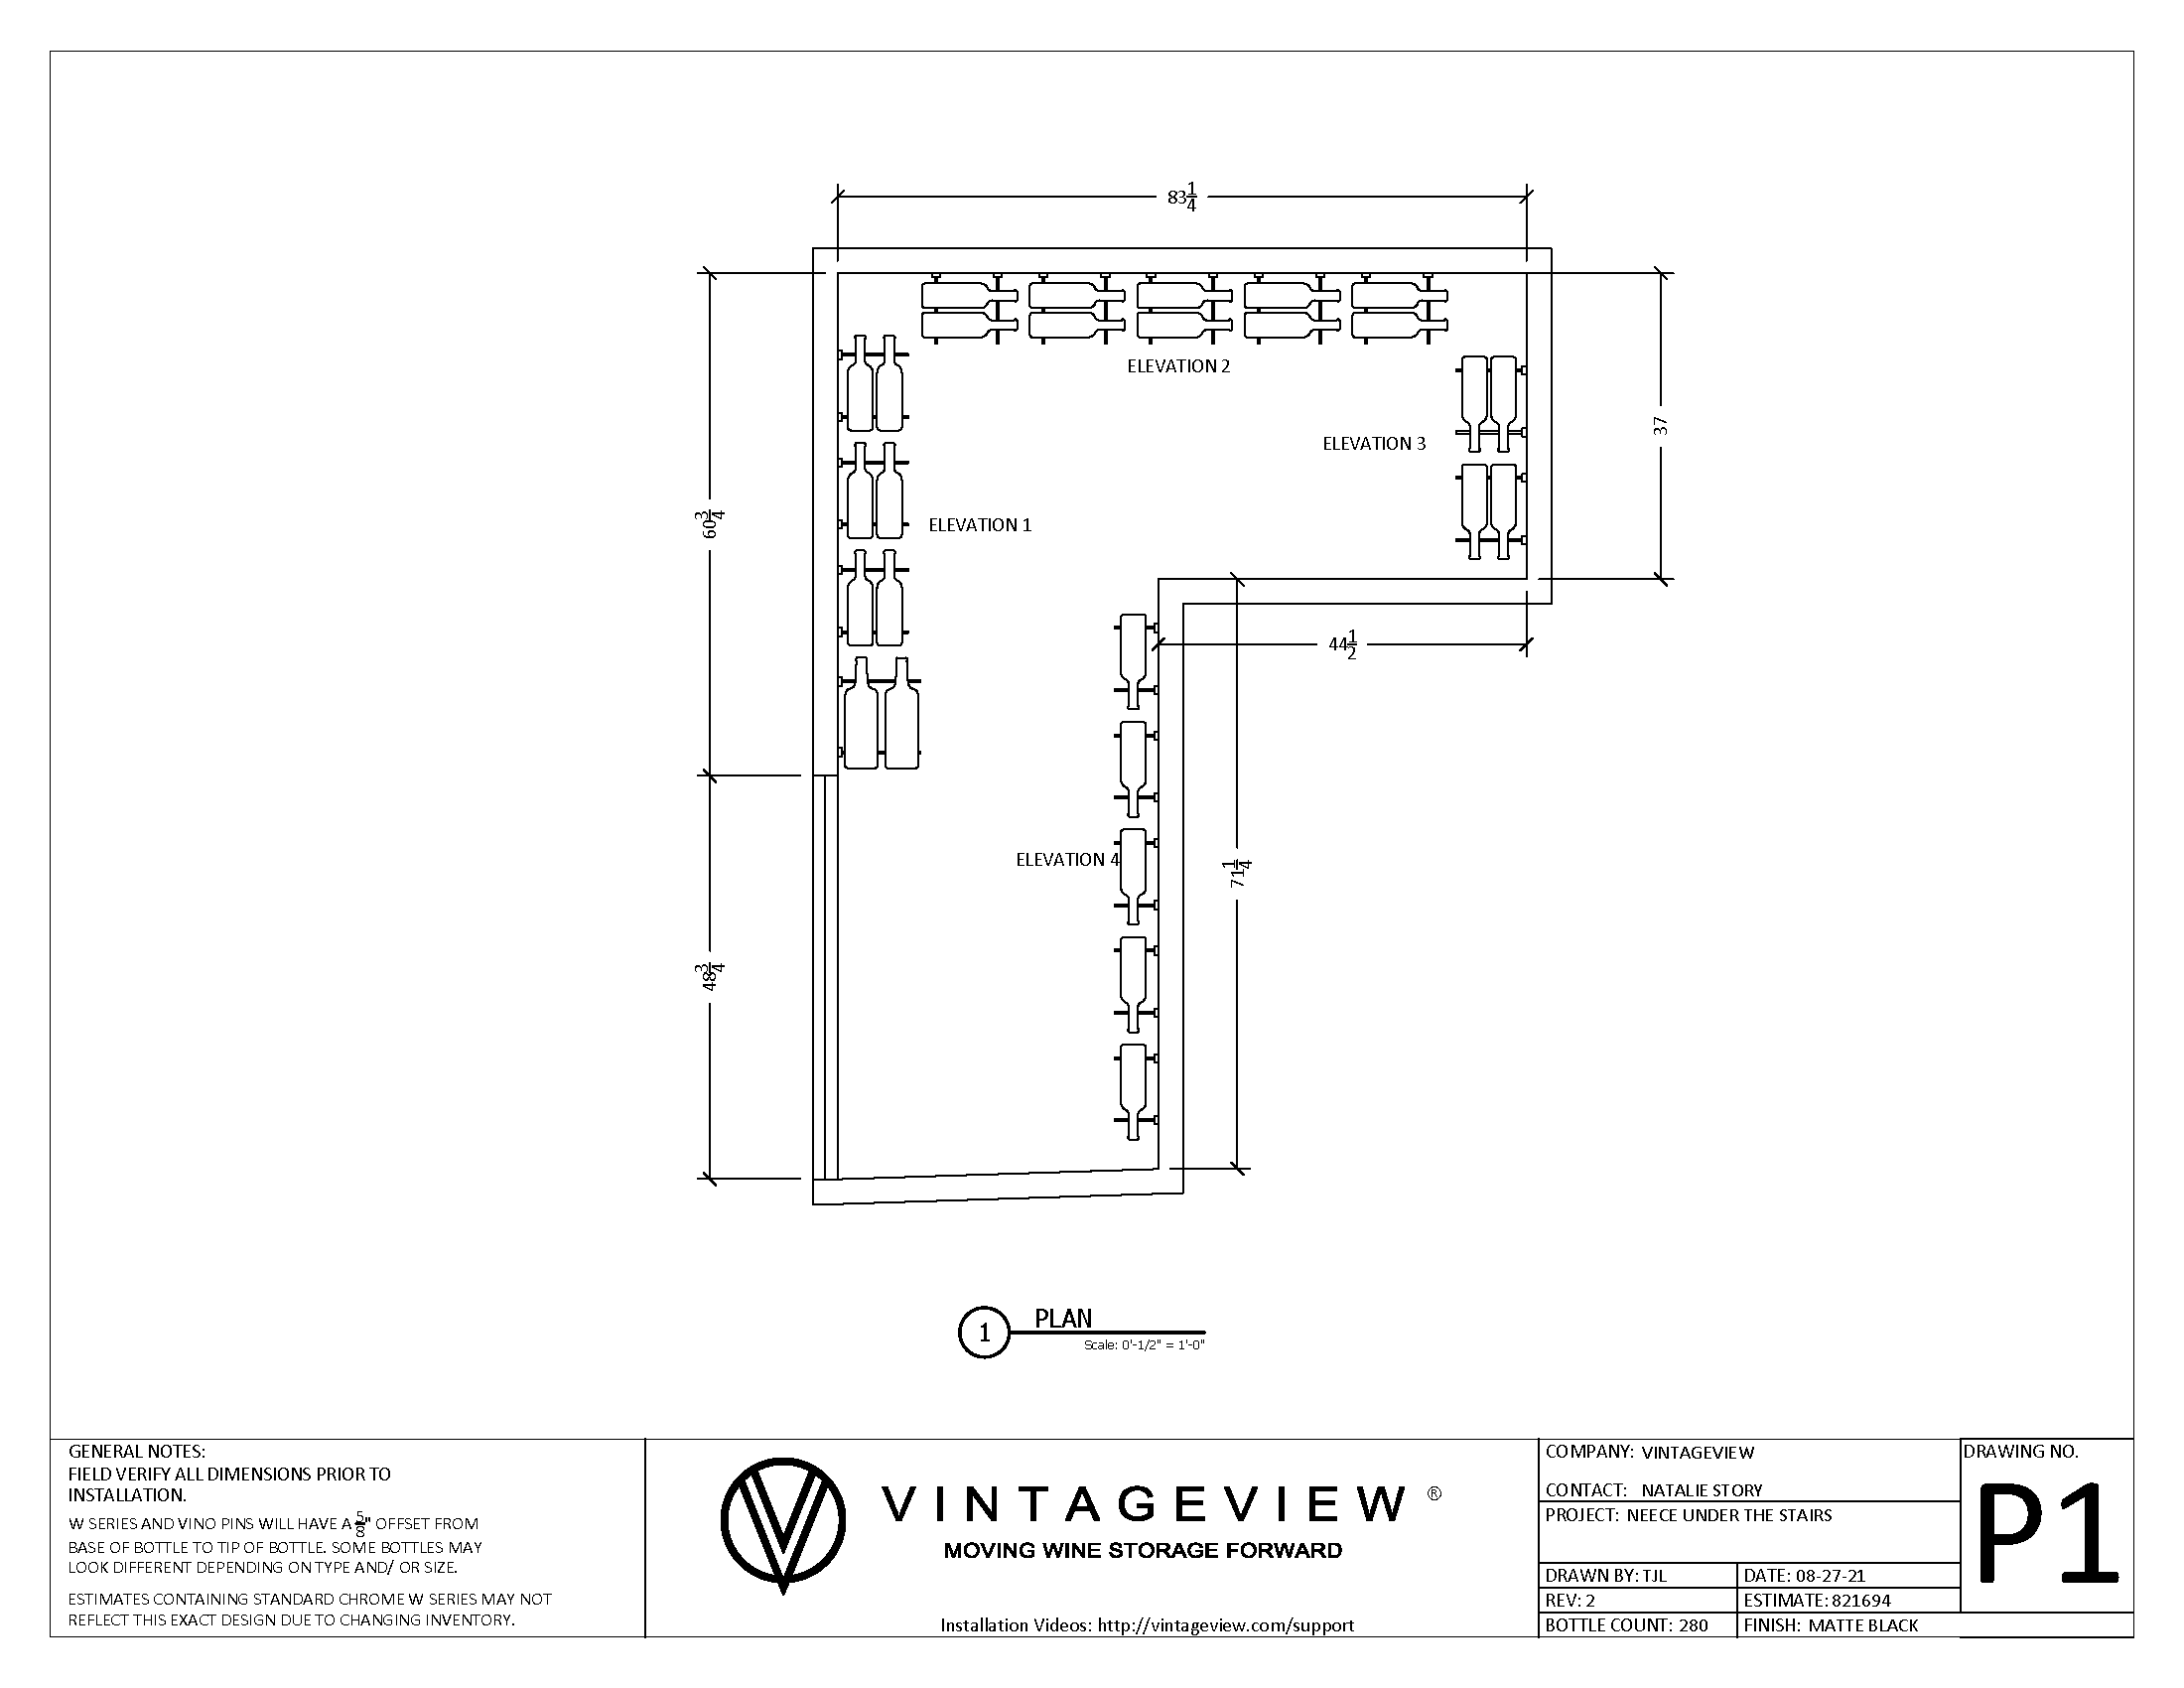
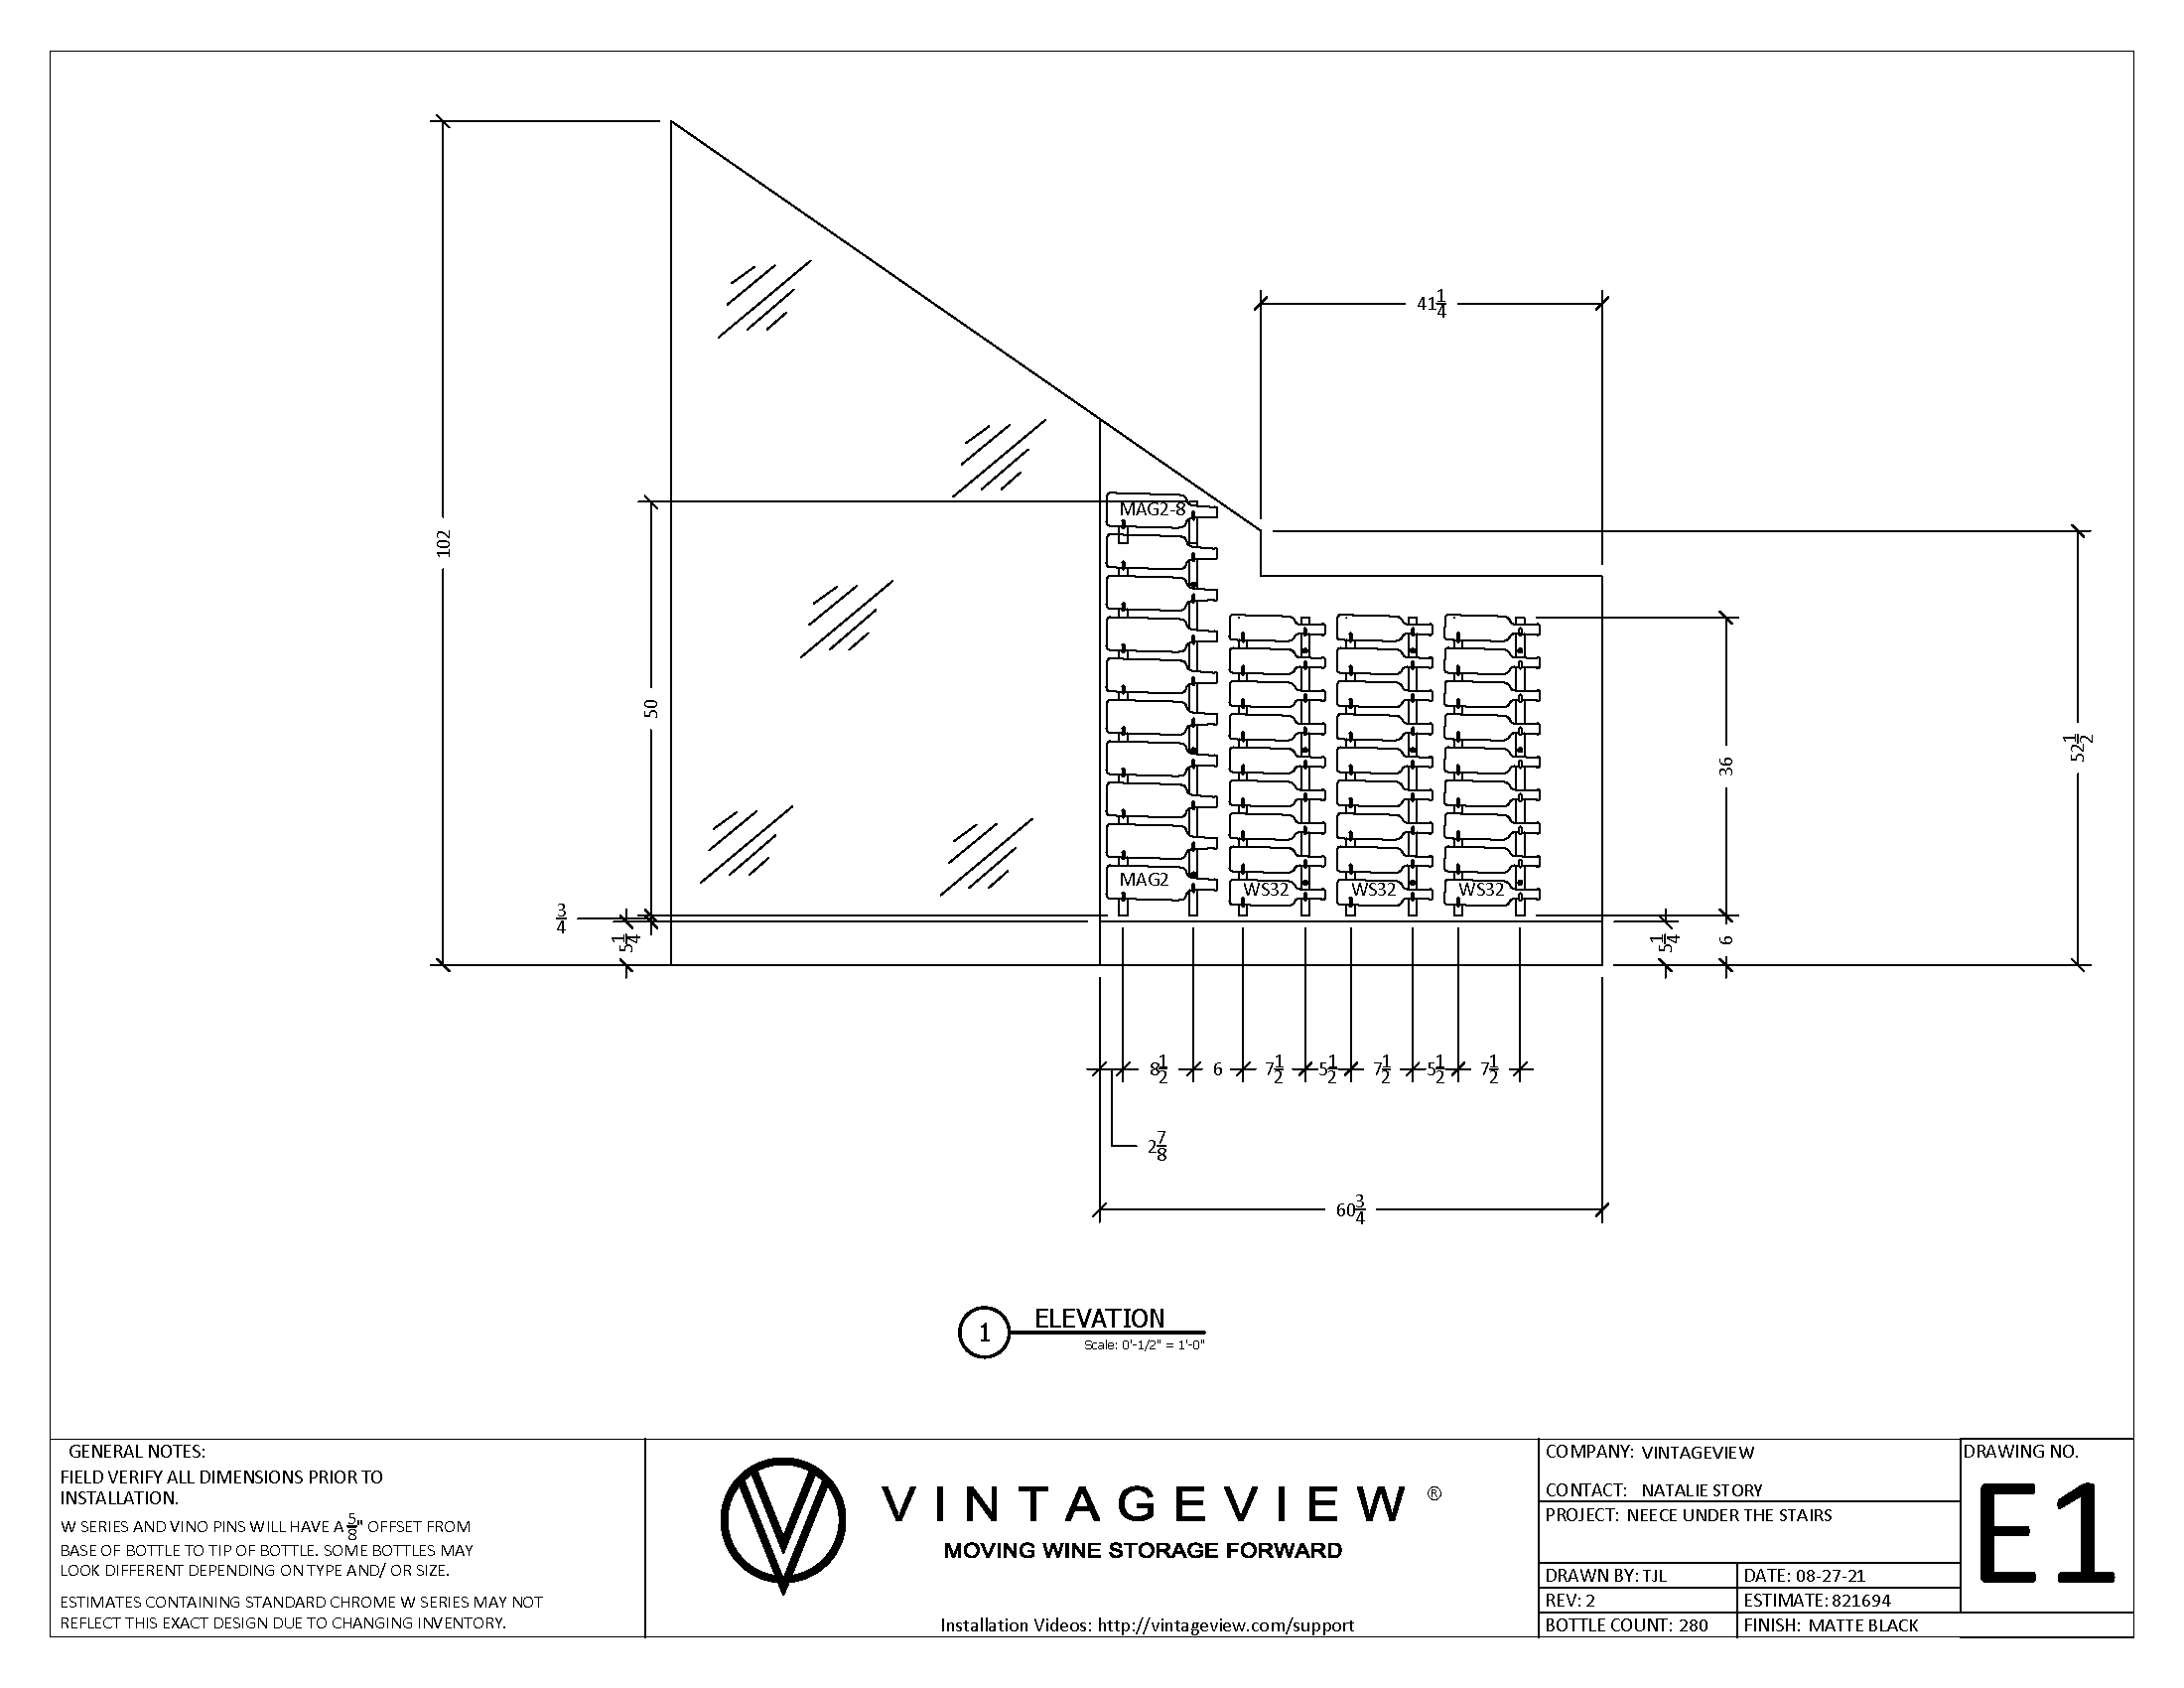
The Second Design
I wasted no time in showing this to my husband. This new design holds 298 bottles (278 Standard and 20 magnum bottles). The extra rack on the back makes up for some bottle loss. At this point, I’m tempted to add on the 3D renderings because I really love seeing virtual designs come to life. So satisfying.
Now I need to really visualize this. Let’s see if my way does anything in helping the decision-making process.
Visualization….hopefully…
I was having a really hard time trying to figure out how far these racks come out from the wall and needed a visualization. The edge of the further tape strip from the wall is the triple rack and the other is for the double rack. I also needed to decide if going from triple racks to double racks will be worth the loss of 61 bottles. Ultimately, I decided triple racking was too crowded to comfortably get in the back storage area and took the bottle loss for comfort and better ease of movement. Maybe. I needed a second opinion.
I double-checked my measurements (Elevation 3 wall is uneven in various spots due to framing that I didn’t do and didn’t check when doing drywall) and sent Natalie the updated measurements after installing the trim just to make sure I still had adequate room and wasn’t going to lose any racks. I also requested to see if we had any room on the very back wall to add 3 bottle racks instead of just 2.
We did not have the room BUT I got news back my measurement adjustments did not affect the racks any and we kept them all.
The racks arrived in around 2 weeks and had installation instructions. I cut the guide boards and was able to install the anchors and screw in all of the racks myself with ease. I could have used an extra set of hands for the taller racks just for convenience but I was able to juggle them well enough, in comparison to the taller racks, the shirt ones were super easy.
I love that this company is so DIY-friendly. I cannot tell you how many people I’ve worked with that kind of snared at the thought of not working with a contractor and undermining those that do things themselves. You don’t need a license to say you know what you’re doing. I understand some of us that DIY jobs can possibly be a pain to work with. I get it. I’ve also worked with a lot of really, really terrible general contractors. So, it really shouldn’t matter if you’re a contractor or a DIY’er. Vintage View has been amazing to work with and I cannot recommend them and their services enough.

